
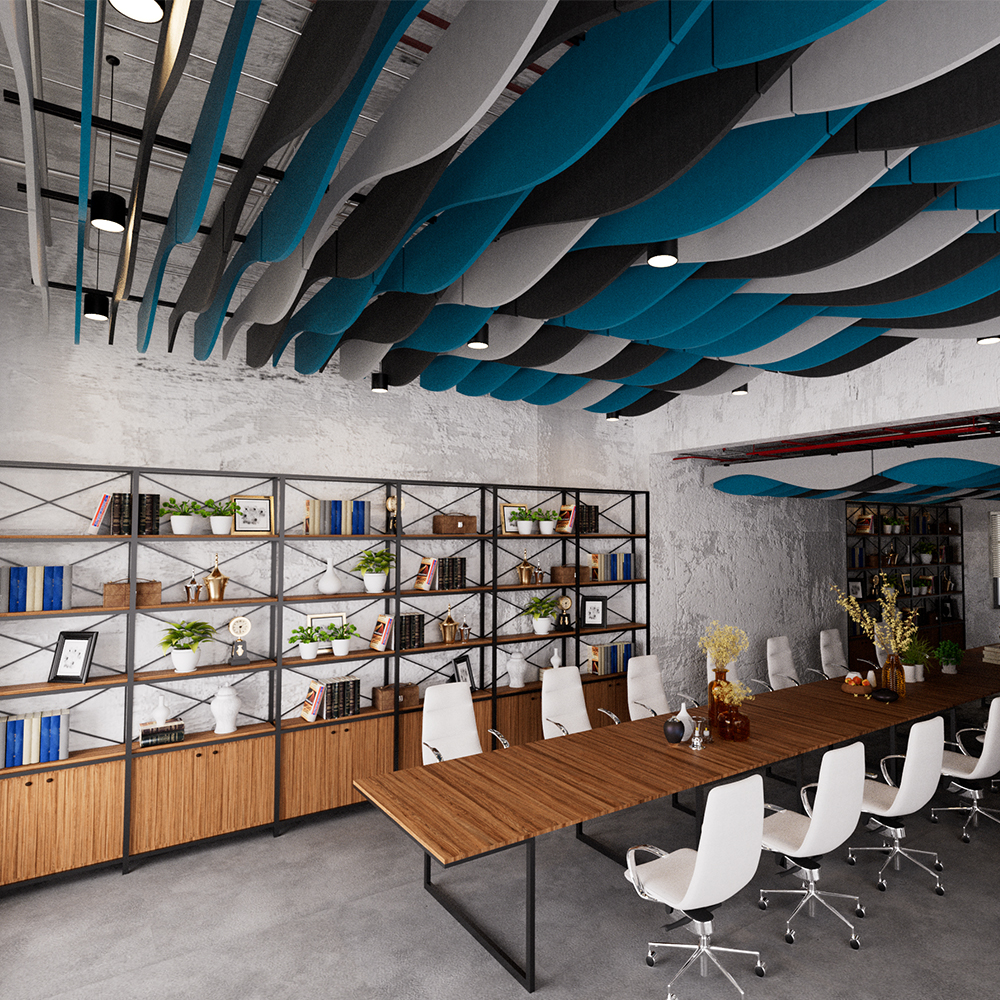
PET acoustic panels, also known as polyester fiber acoustic panels, have become one of the most popular interior acoustic solutions for offices, schools, hotels, restaurants, and residential spaces. They are lightweight, easy to install, and offer excellent sound absorption while adding a modern decorative finish.
Whether you’re an installer, contractor, distributor, or DIY homeowner, understanding the correct installation process is essential for achieving the best appearance and acoustic performance.
In this guide, Leedings Acoustic, a leading acoustic panels supplier and manufacturer of polyester fiber acoustic panels in China, explains how to install PET acoustic panels on walls step by step.
Why Choose PET Acoustic Panels?
Before installation, it’s worth understanding why polyester fiber acoustic panels have become a preferred choice for modern interiors.
They offer:
- Excellent sound absorption
- Lightweight construction
- Easy cutting and fabrication
- Sustainable material made from recycled PET
- Wide range of colors and patterns
- Low maintenance requirements
These advantages make PET panels suitable for both commercial and residential projects.
Tools You’ll Need
Before starting the installation, prepare the following tools:
- Tape measure
- Pencil or chalk line
- Spirit level or laser level
- Utility knife (for thin panels)
- Circular saw or table saw (for thicker panels)
- Jigsaw (for outlets and irregular cuts)
- Construction adhesive
- Screws (if mechanical fixing is required)
- Drill or screwdriver
- Safety glasses and gloves
Having the right tools ensures a faster and more accurate installation.
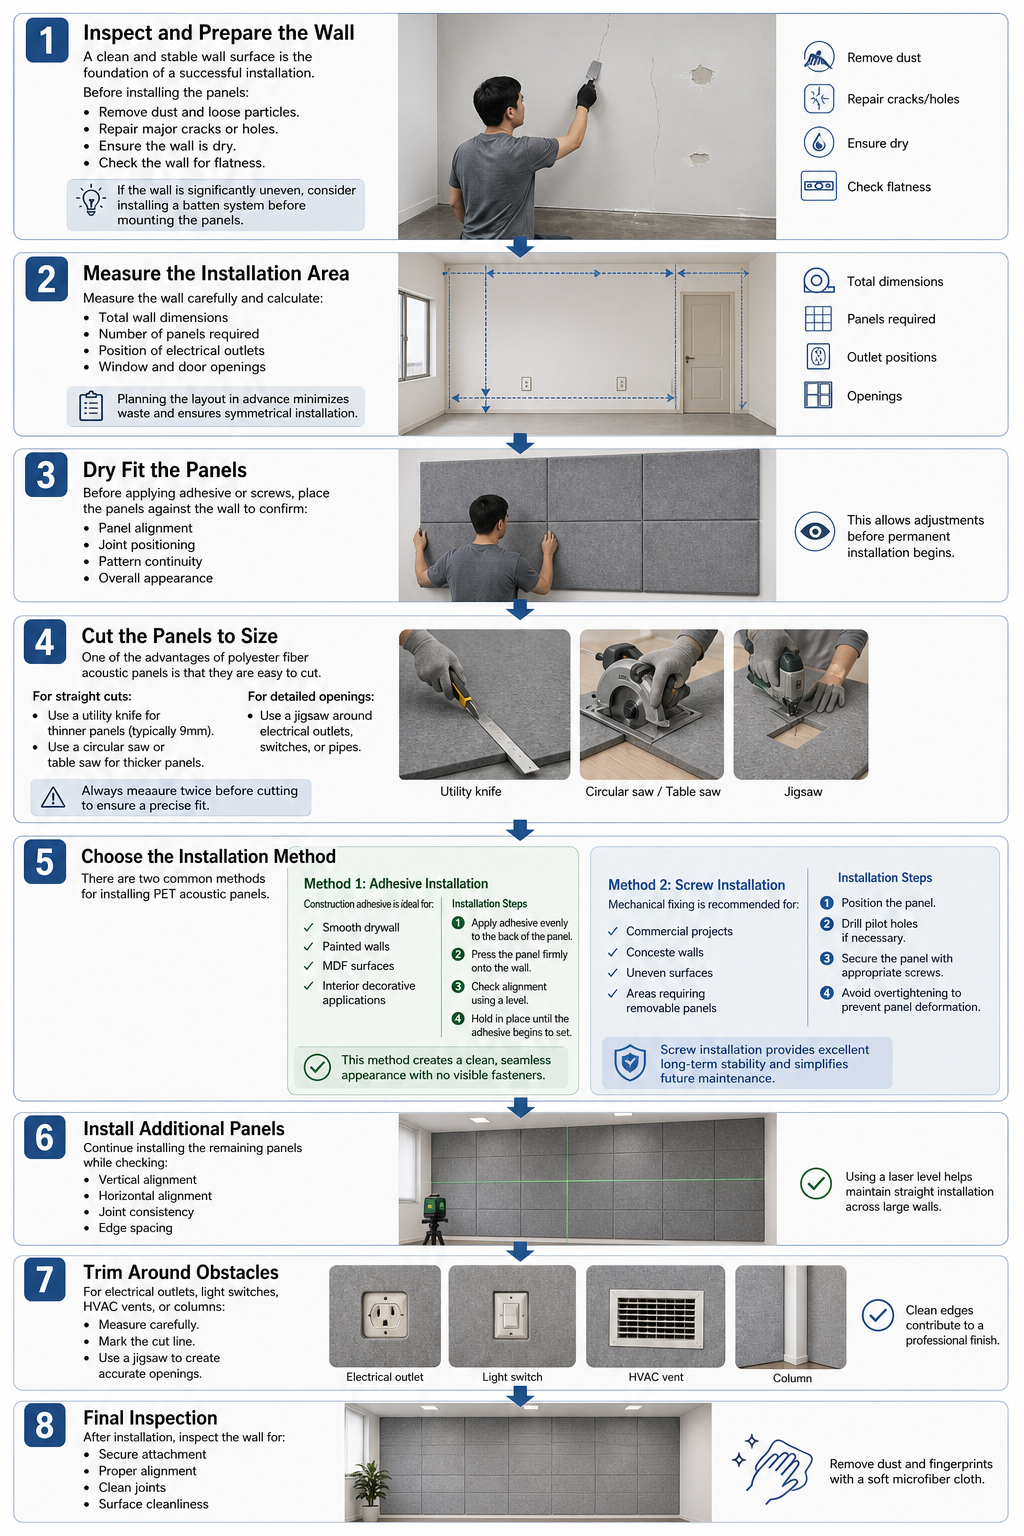
Step 1: Inspect and Prepare the Wall
A clean and stable wall surface is the foundation of a successful installation.
Before installing the panels:
- Remove dust and loose particles.
- Repair major cracks or holes.
- Ensure the wall is dry.
- Check the wall for flatness.
If the wall is significantly uneven, consider installing a batten system before mounting the panels.
Step 2: Measure the Installation Area
Measure the wall carefully and calculate:
- Total wall dimensions
- Number of panels required
- Position of electrical outlets
- Window and door openings
Planning the layout in advance minimizes waste and ensures symmetrical installation.
Step 3: Dry Fit the Panels
Before applying adhesive or screws, place the panels against the wall to confirm:
- Panel alignment
- Joint positioning
- Pattern continuity
- Overall appearance
This allows adjustments before permanent installation begins.
Step 4: Cut the Panels to Size
One of the advantages of polyester fiber acoustic panels is that they are easy to cut.
For straight cuts:
- Use a utility knife for thinner panels (typically 9mm).
- Use a circular saw or table saw for thicker panels.
For detailed openings:
- Use a jigsaw around electrical outlets, switches, or pipes.
Always measure twice before cutting to ensure a precise fit.
Step 5: Choose the Installation Method
There are two common methods for installing PET acoustic panels.
Method 1: Adhesive Installation
Construction adhesive is ideal for:
- Smooth drywall
- Painted walls
- MDF surfaces
- Interior decorative applications
Installation Steps
- Apply adhesive evenly to the back of the panel.
- Press the panel firmly onto the wall.
- Check alignment using a level.
- Hold in place until the adhesive begins to set.
This method creates a clean, seamless appearance with no visible fasteners.
Method 2: Screw Installation
Mechanical fixing is recommended for:
- Commercial projects
- Concrete walls
- Uneven surfaces
- Areas requiring removable panels
Installation Steps
- Position the panel.
- Drill pilot holes if necessary.
- Secure the panel with appropriate screws.
- Avoid overtightening to prevent panel deformation.
Screw installation provides excellent long-term stability and simplifies future maintenance.
Step 6: Install Additional Panels
Continue installing the remaining panels while checking:
- Vertical alignment
- Horizontal alignment
- Joint consistency
- Edge spacing
Using a laser level helps maintain straight installation across large walls.
Step 7: Trim Around Obstacles
For electrical outlets, light switches, HVAC vents, or columns:
- Measure carefully.
- Mark the cut line.
- Use a jigsaw to create accurate openings.
Clean edges contribute to a professional finish.
Step 8: Final Inspection
After installation, inspect the wall for:
- Secure attachment
- Proper alignment
- Clean joints
- Surface cleanliness
Remove dust and fingerprints with a soft microfiber cloth.
Common Installation Mistakes to Avoid
Avoid these common errors:
- Installing on dirty or damp walls
- Measuring panels incorrectly
- Using insufficient adhesive
- Overtightening screws
- Ignoring wall unevenness
- Skipping the dry-fit stage
Taking time during preparation often prevents costly corrections later.
Professional Installation Tips
For the best results:
- Start from the center or a prominent corner of the wall.
- Use a laser level instead of relying on visual alignment.
- Leave a small expansion gap where recommended.
- Install in a climate-controlled environment.
- Store panels flat before installation.
These practices improve both appearance and long-term performance.
Why Choose Leedings Acoustic?
As a professional acoustic panels supplier in China, Leedings Acoustic manufactures premium polyester fiber acoustic panels for commercial and architectural applications worldwide.
Our advantages include:
- Multiple panel thicknesses, including 9mm, 12mm, and 24mm
- CNC cutting and custom shapes
- Wide selection of colors
- Fire-rated options available
- OEM and ODM manufacturing
- Stable quality and consistent production
We supply distributors, contractors, furniture manufacturers, architects, and wholesalers across North America, Europe, Australia, the Middle East, and Asia.
Frequently Asked Questions
Can PET acoustic panels be installed without screws?
Yes. On smooth and stable wall surfaces, construction adhesive is often sufficient. For large commercial installations or uneven walls, mechanical fixing is generally recommended for additional security.
Can PET acoustic panels be installed on concrete walls?
Yes. They can be installed directly using appropriate construction adhesive or mechanical fasteners designed for concrete surfaces.
Can PET acoustic panels be installed on ceilings?
Yes. However, ceiling installations should generally use mechanical fixing or a suspended mounting system rather than adhesive alone to ensure long-term safety.
Conclusion
Installing PET acoustic panels is a straightforward process when the correct preparation, tools, and techniques are used.
By following a step-by-step approach—preparing the wall, planning the layout, selecting the appropriate installation method, and ensuring accurate alignment—you can achieve a clean, durable, and professional result.
Whether you’re upgrading an office, classroom, restaurant, or home, polyester fiber acoustic panels provide an effective solution for improving both acoustics and interior design.
As a trusted acoustic panels supplier and manufacturer of polyester fiber acoustic panels in China, Leedings Acoustic offers high-quality products, custom manufacturing services, and expert support for projects around the world.