

Installing acoustic wall panels on a finished wall is usually straightforward until the panel reaches a socket, switch, pipe, radiator, window trim, or another fixed obstacle.
Straight cuts are easy.
The difficult part is making a clean opening that:
- Matches the obstacle accurately
- Keeps the panel structurally stable
- Prevents PET edges from fraying
- Avoids damaging the MDF slats or backing
- Leaves enough clearance for installation hardware
- Produces a professional finished appearance
For wood slat acoustic panels, these challenges are even more important because the panel is normally a composite construction rather than a single homogeneous board.
A typical slatted acoustic wall panel may combine:
Decorative MDF or wood slats + PET acoustic backing + adhesive or mechanical fixing
This means the correct cutting method depends not only on the shape of the opening, but also on which material layer is being cut.
This guide explains how to cut acoustic wall panels around electrical sockets, switches, pipes, and other difficult obstacles while maintaining a clean finish.
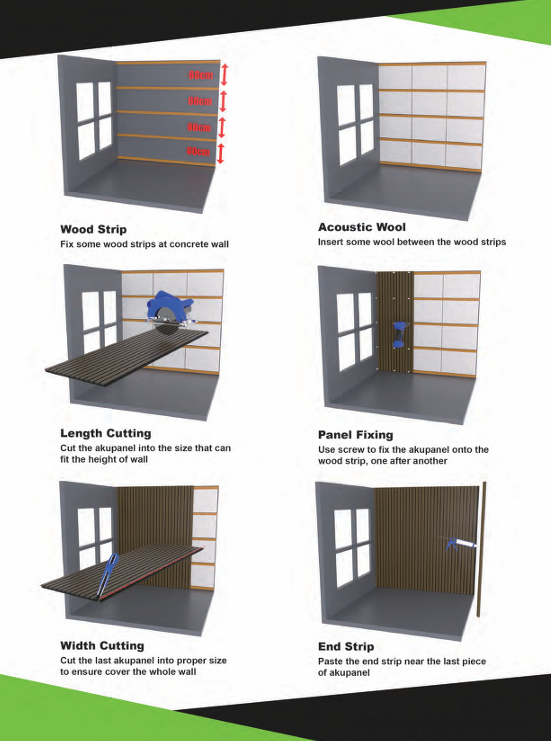
1. Understand the Acoustic Wall Panel Construction Before Cutting
Before choosing a tool, identify exactly what you are cutting.
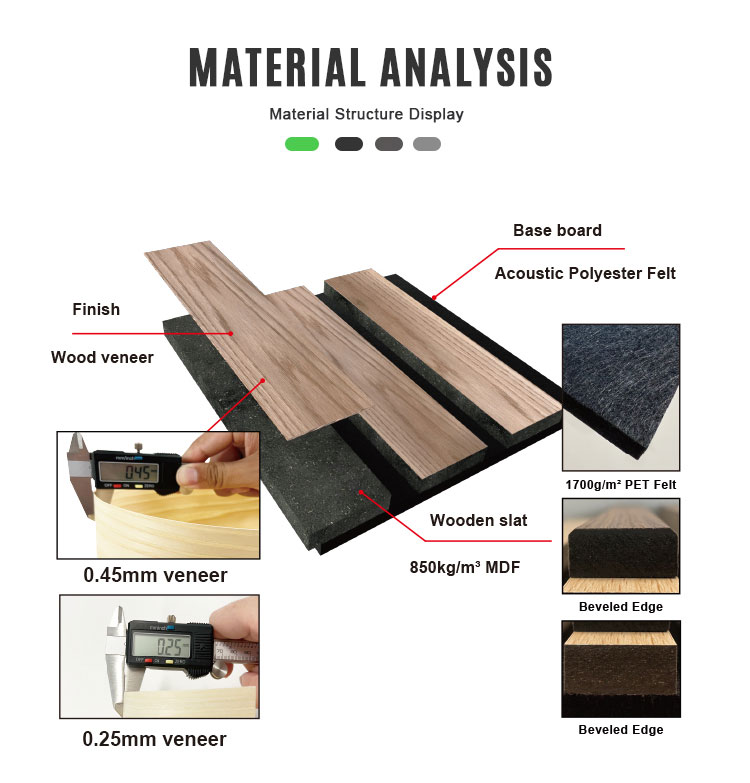
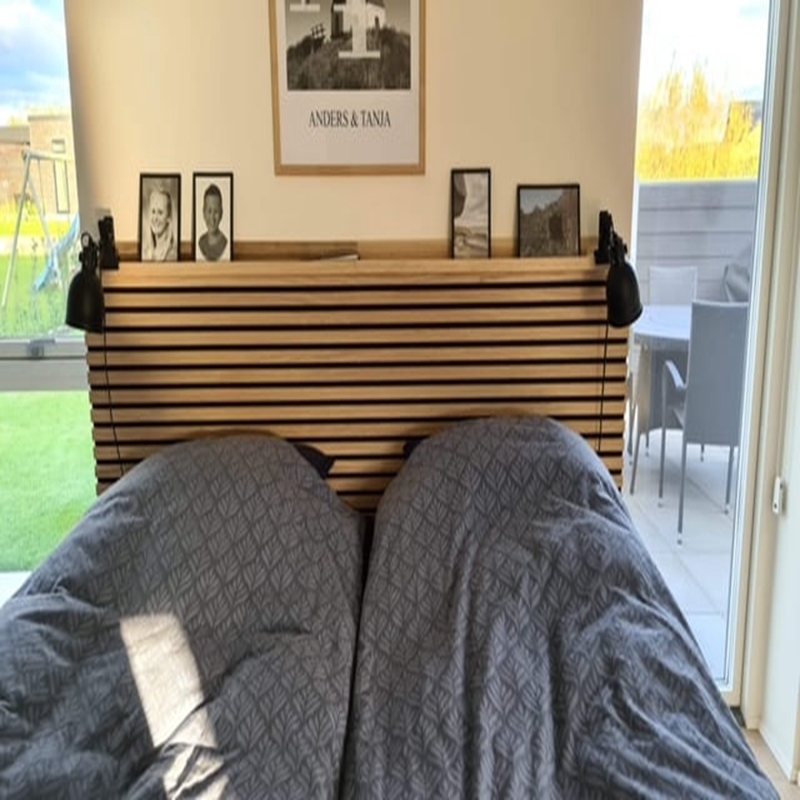
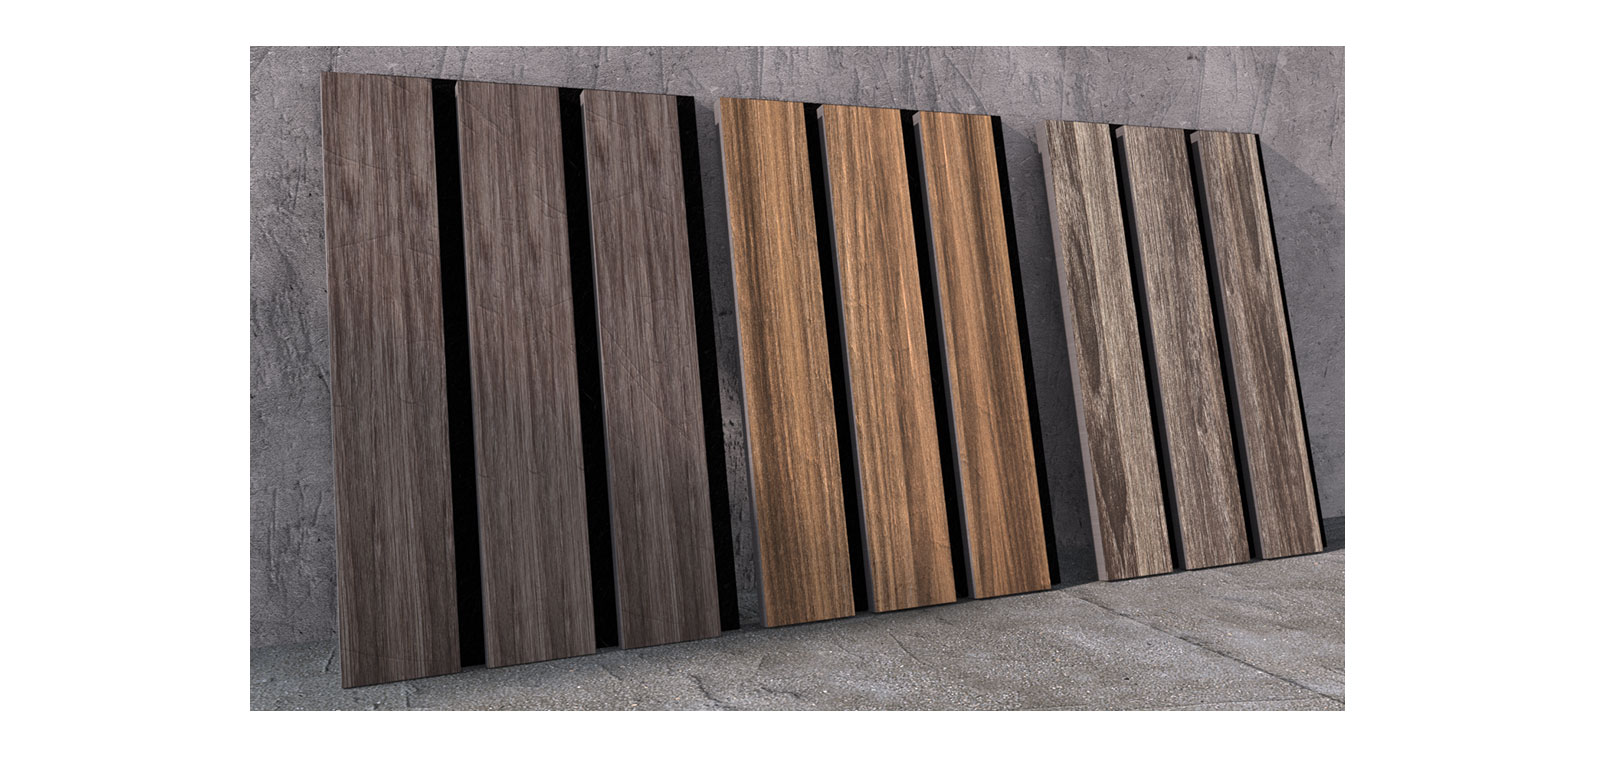
A typical wood slat acoustic panel consists of:
Decorative slats
The visible slats may be made from MDF with a decorative veneer, melamine, laminate, or another surface finish.
The slats provide the visual structure of the product.
PET acoustic backing
Behind the slats is a PET acoustic felt layer.
This backing provides sound absorption and also helps hold the slat assembly together.
Adhesive or structural layer
Depending on the product, the slats may be attached to the PET backing with adhesive.
The exact adhesive and bonding method vary by manufacturer.
This layered construction changes the way the panel should be cut.
For example, a saw that produces a clean MDF cut may not produce the cleanest result on the exposed PET backing.
The objective is therefore not simply:
Cut through the panel.
It is:
Cut each material layer with the tool and technique best suited to that layer.
2. Why Cutting Around Sockets Is More Difficult Than a Straight Cut
A straight cut allows the cutting tool to move continuously in one direction.
A socket opening is different.
You may need to:
- Mark the opening precisely
- Start the cut in the middle of the panel
- Create an internal opening
- Navigate between MDF slats
- Cut the PET backing cleanly
- Maintain the correct opening size
- Keep the panel aligned with the adjacent panels
A mistake of only a few millimeters can become visible once the electrical faceplate is installed.
There is another important issue.
The opening should not automatically be made exactly the same size as the visible faceplate.
The required cut-out depends on the actual electrical box, mounting frame, faceplate, and installation configuration.
Always measure the fixed electrical component that the panel must clear, rather than relying only on the decorative faceplate dimensions.
3. The Five Main Tools for Cutting Acoustic Wall Panels
Different tools are useful for different types of cuts.
1. Fine-Tooth Circular Saw or Track Saw
Best for:
- Long straight cuts
- Cutting MDF slats
- Trimming panels to width
- Creating accurate edge cuts
A fine-tooth blade can help reduce chipping on finished MDF surfaces.
For visible cuts, support the panel properly and avoid forcing the blade through the material.
A track saw is particularly useful when dimensional accuracy and a straight finished edge are important.
2. Jigsaw
Best for:
- Rectangular openings
- Curved cuts
- Socket openings
- Pipe cut-outs
- Irregular shapes
A jigsaw is one of the most versatile tools for acoustic wall panel installation.
A fine-tooth blade designed for wood or laminated board can produce a controlled cut through MDF.
For PET backing, a different blade or cutting approach may produce a cleaner result.
When possible, make a small test cut on a scrap section of the same panel before cutting the visible piece.
3. Oscillating Multi-Tool
Best for:
- Small openings
- Flush trimming
- Difficult corners
- Local modifications
- Areas with limited access
An oscillating tool is particularly useful when a standard saw cannot be positioned comfortably.
It is not usually the fastest tool for large cuts, but it provides good control around obstacles.
4. Hole Saw
Best for:
- Round pipes
- Cable penetrations
- Circular service openings
A hole saw can create a much cleaner round opening than repeatedly cutting around a marked circle with a jigsaw.
The diameter should be based on the actual penetration requirement.
Do not make the hole unnecessarily large simply because it is easier to cut.
5. Utility Knife or PET Cutting Knife
Best for:
- PET backing
- Small trims
- Finishing cuts
- Removing narrow strips
- Cleaning irregular edges
PET acoustic felt can often be cut with a sharp utility knife, particularly for straight or controlled finishing cuts.
Several light passes are usually preferable to one aggressive cut.
This helps maintain a cleaner edge.
4. Which Tool Should You Use for Which Material?
| Task | Recommended Tool | Main Purpose |
|---|---|---|
| Long straight panel cut | Track saw / circular saw | Accurate straight edge |
| MDF slat opening | Jigsaw | Controlled internal cut |
| PET backing cut | Sharp utility knife | Clean felt edge |
| Round pipe penetration | Hole saw | Accurate circular opening |
| Tight corner | Oscillating tool | Local precision cutting |
| Small PET adjustment | Utility knife | Fine trimming |
| Irregular cut-out | Jigsaw | Complex shapes |
For a wood slat acoustic panel, you may use more than one tool for a single opening.
For example:
Jigsaw → MDF slats
Utility knife → PET backing
This is often cleaner than forcing one cutting tool through the entire composite panel.
5. Before Cutting: Make a Full-Size Layout
Most installation mistakes happen before the cutting tool is even turned on.
Do not immediately place the panel against the wall and start marking.
First establish:
- Panel reference edge
- Floor reference
- Centerline of the obstacle
- Obstacle height
- Obstacle width
- Required cut-out dimensions
- Distance from adjacent slats
- Distance from panel edges
A reliable measurement sequence is:
Measure → transfer → check → mark → dry-fit → cut
not:
Measure → cut

6. How to Cut Acoustic Panels Around Sockets
This is one of the most searched and most error-prone installation problems.
The basic process is straightforward, but precision matters.
Step 1: Isolate the electrical work
Do not remove, alter, or cut around live electrical components.
Where electrical equipment needs to be moved, disconnected, extended, recessed, or otherwise modified, the work should be carried out by a suitably qualified electrician in accordance with applicable local requirements.
The panel installer should only perform the non-electrical cutting and fitting work that the electrical installation allows.
Never use a cutting tool near an energized cable or electrical box.
Step 2: Establish the socket position
Measure the socket box from two fixed references.
For example:
Left wall reference → socket center
and:
Finished floor → socket center
Do not measure only from the previous panel.
Using two independent reference points reduces cumulative measurement error across a wall.
Step 3: Transfer the dimensions to the back of the panel
Whenever practical, mark the opening from the rear face.
Mark:
- Left edge
- Right edge
- Top edge
- Bottom edge
- Centerline
Extend the reference lines beyond the opening so they remain visible during cutting.
If the panel has regularly spaced slats, also mark which slats will intersect the opening.
Step 4: Verify the layout before cutting
Hold the panel in its actual installation position or use a cardboard template.
Check:
- Socket center
- Opening size
- Slat alignment
- Panel edge position
- Clearance around the electrical component
This dry-fit check is extremely useful.
A five-minute check can prevent an expensive full-panel mistake.
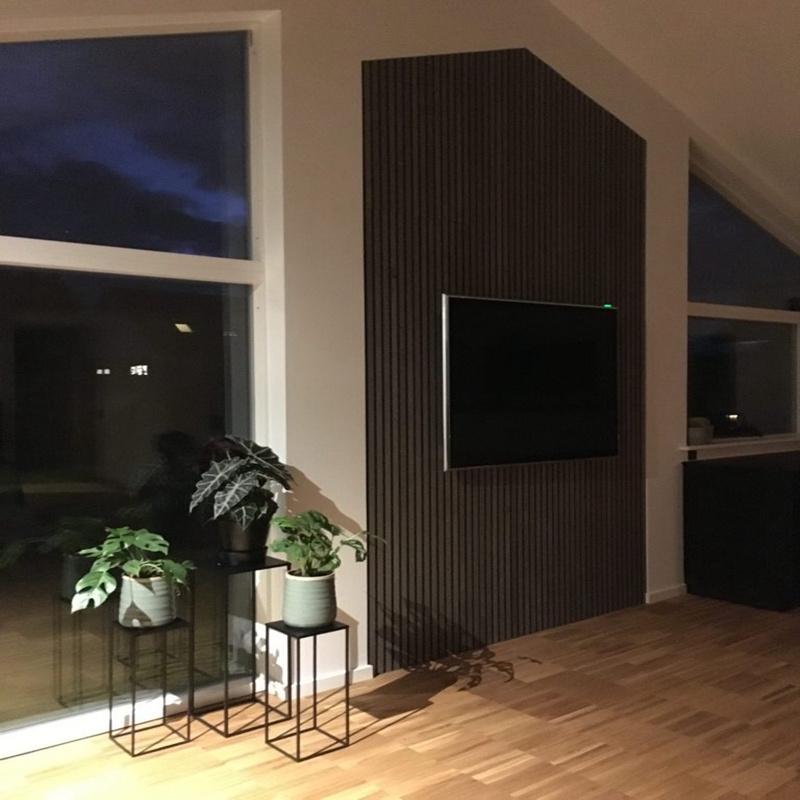
7. How to Make a Precise Socket Opening in a Wood Slat Panel
Once the layout is confirmed, identify the slats that cross the opening.
For a rectangular socket opening:
Start the internal opening
Use a drill to create starter holes at appropriate corners if required by the selected jigsaw blade and cutting method.
The starter holes should remain inside the waste area so that they do not become part of the visible finished opening.
Cut the MDF slats
Use a fine-tooth jigsaw blade or another suitable cutting tool.
Move slowly through the slats.
Do not force the blade.
For finished decorative surfaces, support the panel properly to reduce vibration and chipping.
Cut the PET backing
After the MDF section is cut, trim the PET backing separately with a sharp knife where practical.
This can produce a cleaner felt edge than aggressively forcing the jigsaw through both layers.
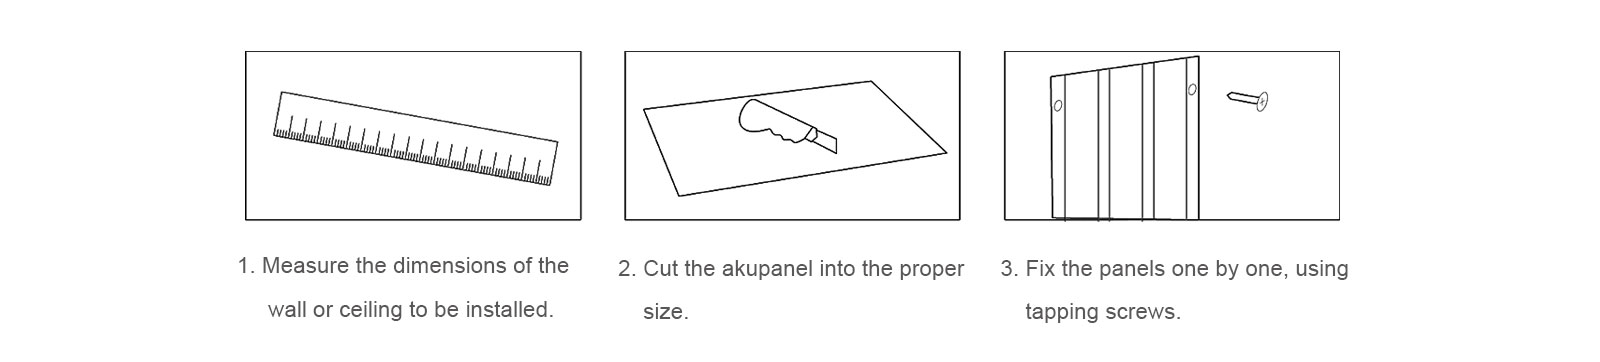
8. A Four-Step Method for Socket and Switch Cut-Outs
For repetitive commercial installation, use a standardized four-step process:
1. Establish the reference
Measure the socket position from the floor and a fixed wall reference.
2. Transfer the opening
Mark the complete cut-out on the rear of the panel.
3. Cut the rigid layer
Cut the MDF slats carefully with the selected saw.
4. Finish the backing
Trim the PET backing, test-fit the panel, and clean the edge before final installation.
For a professional installation team, this process can be turned into a simple site checklist.
9. How to Prevent Chipping on MDF Slats
Decorative MDF surfaces are vulnerable to chipping when cut with an unsuitable blade or excessive feed speed.
Several practices can improve the cut:
Use the correct blade
A blade with a suitable tooth count for finished MDF generally produces a cleaner cut than a coarse demolition blade.
Reduce vibration
Support the panel close to the cutting line.
Avoid excessive feed pressure
Let the tool perform the cutting rather than forcing it.
Protect the finished surface
Depending on the tool and cutting direction, masking tape can sometimes help reduce surface splintering during layout and cutting.
Test the technique on an offcut first because the effectiveness depends on the panel’s surface finish and blade.
Finish visible edges
If an opening has a highly visible edge, lightly clean the cut surface rather than leaving torn fibers or loose material.
10. How to Cut PET Acoustic Backing Without Fraying
PET felt behaves differently from MDF.
The biggest problem is usually not chipping.
It is:
Ragged or uneven edges.
A blunt knife can crush and deform the fibers instead of cutting them cleanly.
Use:
- A sharp utility knife
- A straightedge for long cuts
- Several controlled passes
- A stable cutting surface
For small openings, score along the marked line first.
Then make a second pass to complete the cut.
Do not repeatedly saw back and forth through the same PET edge.
That can create a fuzzy, uneven appearance.
11. How to Cut Acoustic Panels Around Pipes
Pipes create a different challenge because the penetration is usually circular.
Common examples include:
- Heating pipes
- Water pipes
- Drain pipes
- Conduits
- Radiator connections
- HVAC lines
The cleanest method depends on the diameter and location of the pipe.
Round Pipe Through the Middle of the Panel
For a simple circular penetration, use a hole saw sized to the required opening.
Mark the pipe center.
Drill from the visible face where appropriate for the cutting tool and panel construction.
Then finish the PET layer separately if required.
Keep the opening controlled
Do not oversize the hole unnecessarily.
A large gap:
- Looks unfinished
- Reduces the quality of the installation
- Makes trim work more difficult
- Can create an unnecessary visible shadow
The final clearance should allow the panel to be installed without forcing it against the pipe.
12. How to Cut Around a Pipe Near the Panel Edge
This is where a half-circle notch is useful.
Suppose a pipe emerges immediately beside the edge of the panel.
A complete hole cannot be drilled because the pipe is not enclosed by the panel.
Instead:
Measure the pipe centerline
↓
Mark half the pipe diameter
↓
Transfer a semicircle to the panel edge
↓
Cut the semicircle
↓
Slide the panel around the pipe
This creates a clean half-round opening.
13. How to Make a Clean Semi-Circular Pipe Notch
For a professional result:
Step 1: Measure the outside diameter
Measure the actual pipe, not only the nominal pipe size.
Step 2: Locate the pipe center
Measure from the nearest wall and floor reference.
Step 3: Add appropriate installation clearance
The clearance depends on the actual installation and finishing detail.
Do not automatically make the notch exactly equal to the pipe diameter.
Step 4: Draw the semicircle
Use a compass, template, or suitable round object matching the required radius.
Step 5: Cut the rigid slats
Use a jigsaw or suitable fine-cutting tool.
Step 6: Trim the PET backing
Use a sharp utility knife.
Step 7: Test-fit before adhesive fixing
Slide the panel into position and check the result.
This is particularly important when the pipe is visible because the gap will remain visually obvious after installation.
14. Avoiding PET Edge Damage Around Pipe Cut-Outs
Pipe penetrations are particularly prone to rough PET edges because the panel often needs to be rotated or slid sideways during installation.
The best sequence is:
Cut → inspect → trim → dry-fit
rather than:
Cut → force panel into position
If the opening is too small, forcing the panel can:
- Compress the PET
- Tear the backing
- Damage the slats
- Distort the opening
- Create an uneven gap
Make the smallest clean opening that provides the necessary installation clearance.
15. Working Around Difficult Obstacles
Not every obstacle is rectangular or circular.
You may encounter:
- Radiator brackets
- HVAC conduits
- Cable trays
- Window frames
- Door casings
- Skirting boards
- Structural columns
- Wall-mounted displays
- Fire alarm devices
- Data outlets
For irregular obstacles, use a template-based approach.
Create a cardboard or rigid-board template of the obstacle.
Transfer the shape to the acoustic panel.
Then cut the panel from the transferred outline.
This is particularly useful for expensive decorative panels where a wrong cut cannot easily be hidden.
16. Scribe Cutting for Uneven Walls
Walls are not always perfectly straight.
A panel may need to fit around:
- Uneven plaster
- Stonework
- Existing trim
- Columns
- Irregular corners
In these situations, scribing can produce a much better result than forcing the panel into position.
Hold the panel in approximately its final position.
Transfer the wall profile onto the panel.
Then remove material gradually until the panel follows the wall.
For large commercial installations, make the first panel a template.
Once the template is correct, use it to reproduce subsequent panels.
This can dramatically reduce installation time.
17. How to Handle a Socket Between Two Slats
This situation can actually be easier than a socket centered directly through a slat.
If the socket falls entirely within the PET-backed gap between two slats:
- Mark the opening
- Check whether the PET layer needs trimming
- Make the opening without unnecessarily cutting the surrounding slats
- Maintain sufficient clearance for the electrical component and faceplate
However, do not assume the socket position will always align perfectly with the slat spacing.
During design planning, the slat layout can sometimes be shifted slightly to minimize difficult cut-outs.
For large projects, this is worth considering before production.
18. Plan Socket Locations Before Installing the Full Wall
For a commercial interior, the most efficient approach is to coordinate the acoustic panel layout with the electrical layout before installation begins.
Review:
- Socket locations
- Data outlets
- Light switches
- Wall-mounted screens
- Controls
- Fire alarm devices
- HVAC controls
- Display equipment
Then determine:
Which obstacles will require panel cut-outs?
You can sometimes avoid difficult cuts entirely by adjusting the panel layout.
For example, instead of placing a socket directly through the center of a decorative slat, the panel grid can be shifted so that the opening falls in a less visually sensitive location.
This is much easier to solve during design than after the panel has already been cut.
19. Use a Cutting Schedule for Large Projects
For commercial projects involving dozens or hundreds of acoustic panels, individual on-site measurement creates unnecessary risk.
Create a cutting schedule.
For each panel record:
| Panel | Location | Cut-out | Position | Tool |
|---|---|---|---|---|
| P01 | Meeting Room A | Socket | 450 mm from edge / 1100 mm AFF | Jigsaw |
| P02 | Meeting Room A | Pipe | 80 mm diameter | Hole saw |
| P03 | Office B | Data outlet | 100 × 60 mm | Jigsaw |
| P04 | Corridor | Column | Custom profile | Template |
| P05 | Office C | HVAC conduit | Half-round | Jigsaw |
AFF = Above Finished Floor
This creates a repeatable installation process and makes quality control much easier.
20. Factory CNC Cutting vs. On-Site Cutting
For high-volume projects, some openings may be better produced at the factory.
Factory CNC cutting can be useful for:
- Repeated socket patterns
- Repeated switch openings
- Standard service penetrations
- Complex geometric cut-outs
- Branded patterns
- Identical modular panels
The advantages include:
- Higher dimensional consistency
- Better repeatability
- Reduced site labor
- Cleaner finishing
- Less cutting waste
However, on-site cutting is still necessary when:
- Existing building dimensions vary
- Pipe positions are uncertain
- Services are installed late
- Wall conditions differ from drawings
- Field tolerances are significant
A hybrid approach is often practical:
Factory-cut standard openings + field-cut variable conditions

21. Common Cutting Mistakes
Mistake 1: Measuring the faceplate instead of the electrical box
The visible faceplate does not necessarily define the required cut-out.
Measure the actual installation condition.
Mistake 2: Cutting through MDF and PET with the same aggressive blade
Different materials respond differently to cutting.
Separate the operations when this produces a cleaner edge.
Mistake 3: Making oversized openings
A large gap may be easier to install but can create a visibly poor finish.
Mistake 4: Cutting before dry-fitting
Even accurate drawings cannot account for every wall tolerance.
Test the panel position before making the final cut.
Mistake 5: Ignoring slat alignment
A technically correct opening can still look wrong if the surrounding slats are poorly positioned.
Mistake 6: Forcing the panel around a pipe
An undersized notch can tear the PET backing or damage the slats.
Mistake 7: Using blunt blades
Blunt blades tend to crush PET and increase MDF chipping.
Mistake 8: Modifying live electrical equipment
Electrical disconnection, relocation, or alteration should be performed by an appropriately qualified electrician.
22. A Professional Installation Sequence
For installers working with wood slat acoustic wall panels, the complete process can be standardized:
Step 1 — Survey the wall
Record:
- Dimensions
- Corners
- Sockets
- Switches
- Pipes
- Windows
- Doors
- Fixed equipment
Step 2 — Plan the panel layout
Determine:
- Starting edge
- Slat alignment
- Joint locations
- Panel sequence
- Cut-out locations
Step 3 — Create templates where necessary
Use cardboard or rigid templates for complex obstacles.
Step 4 — Transfer dimensions
Mark all cut-outs on the rear of the panel.
Step 5 — Cut the MDF or rigid components
Use an appropriate fine-cutting tool.
Step 6 — Cut the PET backing
Use a sharp knife and controlled passes.
Step 7 — Dry-fit the panel
Check all clearances before final installation.
Step 8 — Clean the cut edges
Remove loose fibers and damaged material.
Step 9 — Install the panel
Follow the manufacturer’s approved adhesive or mechanical fixing method.
Step 10 — Perform final inspection
Check:
- Panel alignment
- Cut-out accuracy
- Visible gaps
- Slat continuity
- PET edge quality
- Hardware clearance
- Overall visual finish
23. The Goal Is a Clean Cut, Not Just a Functional Opening
When cutting acoustic wall panels around services, there are two separate standards:
Functional fit
The panel clears the obstacle and can be installed.
Architectural finish
The opening looks intentional and professionally integrated.
For a residential utility room, a functional cut may be acceptable.
For a luxury hotel, office headquarters, showroom, or architectural project, the cut-out becomes part of the visual quality of the installation.
That is why measurement, panel layout, cutting sequence, and edge finishing are just as important as the cutting tool itself.
Final Takeaway
Cutting acoustic wall panels around sockets, pipes, and other obstacles is not difficult once the panel construction and installation sequence are understood.
For wood slat acoustic panels with PET backing, the most reliable approach is to treat the panel as a composite system:
Measure the obstacle → mark the rear face → cut the rigid MDF/wood components → trim the PET backing → dry-fit → finish the edges → install
Use:
Track or circular saw for long straight cuts.
Jigsaw for rectangular and irregular openings.
Hole saw for round penetrations.
Oscillating tool for difficult local cuts.
Sharp utility knife for PET backing and final trimming.
For sockets and switches, coordinate the acoustic panel layout with the electrical plan before installation. Any electrical disconnection, relocation, wiring modification, or work on energized equipment should be handled by a qualified electrician and in accordance with local electrical requirements.
For pipes, a correctly measured semicircular notch is usually cleaner and more reliable than cutting an oversized opening.
For large commercial projects, use cutting schedules, templates, and factory CNC cutting where the opening pattern is repetitive.
The best installation is not simply one that makes the panel fit.
It is one where the acoustic panel, electrical services, plumbing, architectural details, and final interior design appear to have been planned as one system.